Build a UI that interacts with your Cairo smart contract
In the first part of this series, we guided you through bootstrapping your dApp with Starknet-Scaffold. We covered setting up the development environment, writing a basic ERC20 token smart contract in Cairo, and deploying it to the Starknet testnet using the Scaffold Deployer.
We highly recommend reading Part 1 before continuing: link.
Now, let’s build the user interface (UI) to allow users to interact with your deployed smart contract.
Building the User Interface
With a functional smart contract deployed, we now need a user interface to interact with it. This UI will allow users to interact with the functions in your token contract.
Run npx create-starknet-app, follow the prompts to type in your package name and select fullstack as the type.

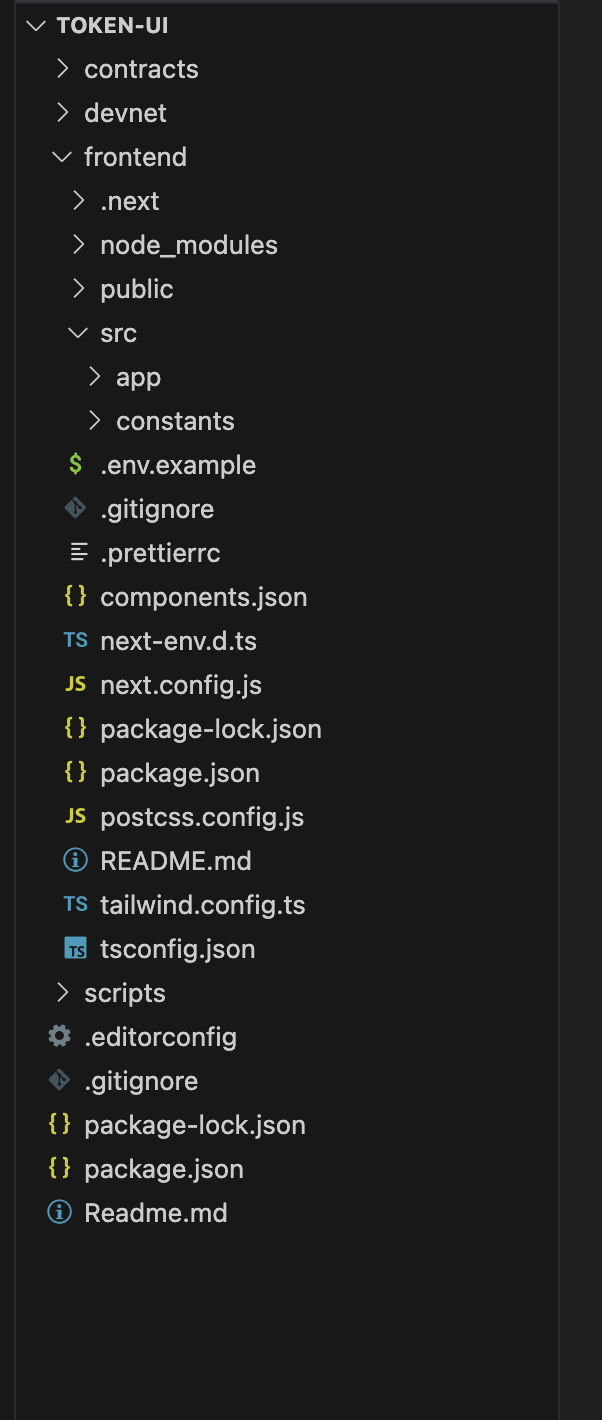
Once the setup is complete, your codebase will bear a semblance to the following structure. For this article, we’ll focus on the frontend folder.
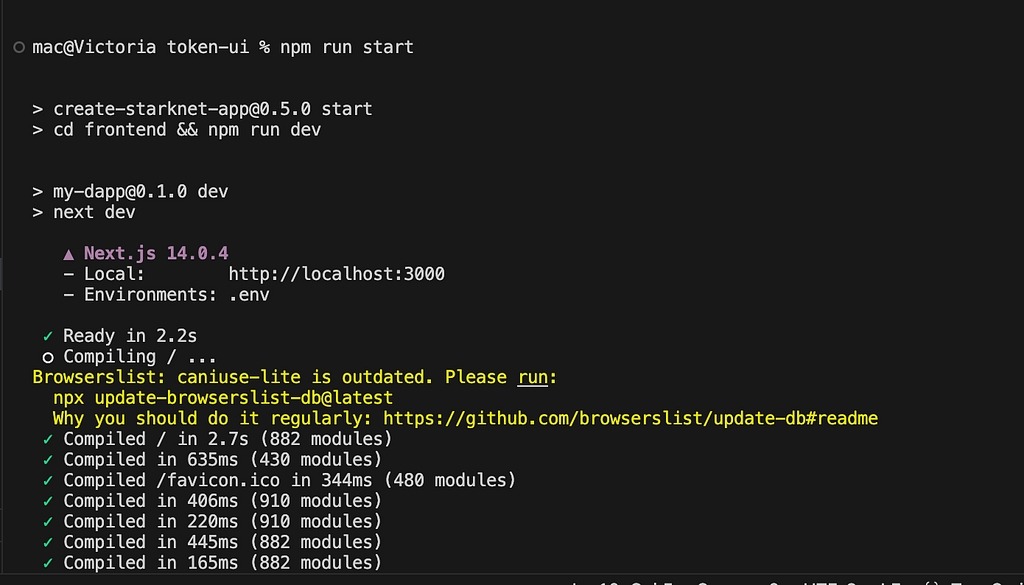
Run npm install, then npm run start
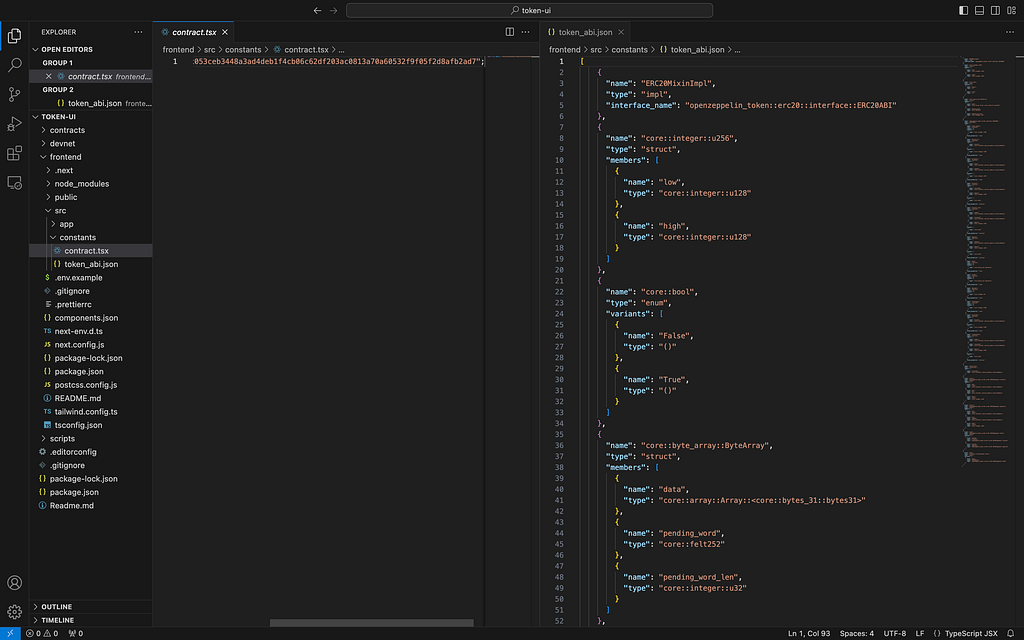
I added a folder called constant that contains the token contract ABI and another file that contains the contract address.
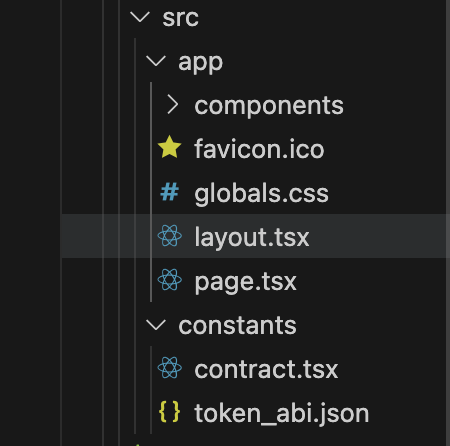
Replace the code in page.tsx with the one below.
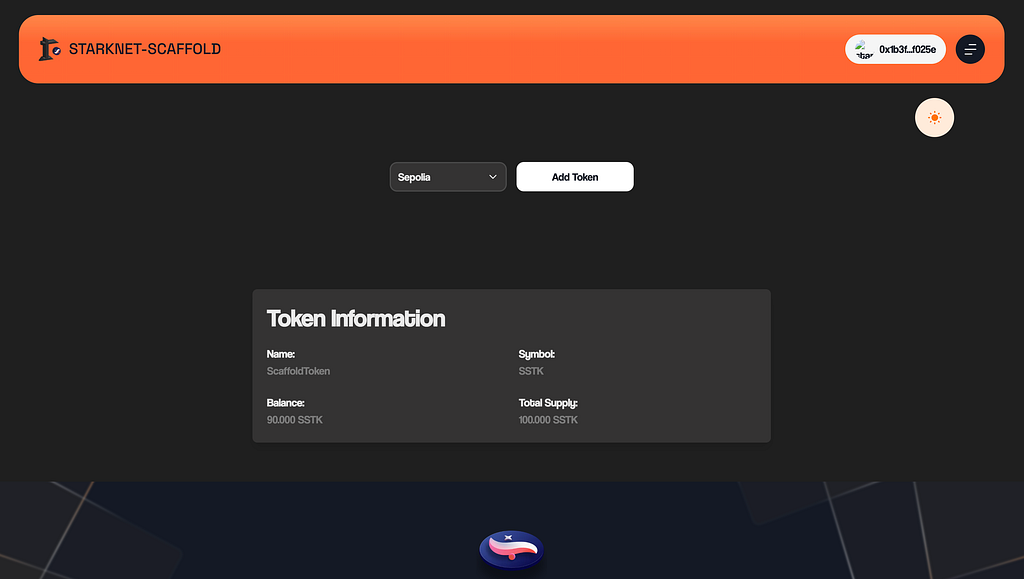
We have modified the code to display details about the token, such as the name, symbol, total supply, and the connected user’s balance.
"use client";
import NetworkSwitcher from "./components/lib/NetworkSwitcher";
import Header from "./components/internal/Header";
import AddTokenButton from "./components/lib/AddToken";
import {
useAccount,
useContractRead
} from "@starknet-react/core";
import tokenAbi from "../../public/abi/token.abi.json";
import { address as contractAddress } from "../constants/contract";
import { formatCurrency } from "../app/components/internal/helpers";
type Props = {
address: string;
heading?: boolean;
};
export default function Home() {
const { address } = useAccount();
const { data: sstk, isLoading: sstkLoading } = useContractRead({
address: contractAddress,
abi: tokenAbi,
functionName: "balanceOf",
args: [address!],
watch: true,
});
const { data: totalSup, isLoading: totalSupplyLoading } = useContractRead({
address: contractAddress,
abi: tokenAbi,
functionName: "totalSupply",
args: [],
watch: true,
});
// @ts-ignore
const bal = formatCurrency(sstk?.balance.low.toString());
// @ts-ignore
const supply = formatCurrency(totalSup?.totalSupply.low.toString());
return (
<main className="flex min-h-svh flex-col justify-between gap-16">
<Header />
{/* HERO --> */}
<section className="pt-[8rem] md:pt-[clamp(200px,25vh,650px)]">
<div className="mx-auto flex max-w-[600px] flex-col gap-8 p-4 text-center md:max-w-[850px] md:p-8">
<div className="flex items-center justify-center gap-4">
<NetworkSwitcher />
<AddTokenButton />
</div>
</div>
</section>
{/* <-- END */}
<section className="pt-[4rem]">
<div className="mx-auto max-w-[600px] rounded-lg bg-[--link-card] p-6 shadow-lg md:max-w-[850px]">
<h3 className="mb-6 text-xl font-semibold text-[--headings]">Token Information</h3>
<div className="grid grid-cols-2 gap-6">
<div>
<p className="text-lg font-semibold text-[--headings]">Name:</p>
<p className="text-lg">ScaffoldToken</p>
</div>
<div>
<p className="text-lg font-semibold text-[--headings]">Symbol:</p>
<p className="text-lg">SSTK</p>
</div>
<div>
<p className="text-lg font-semibold text-[--headings]">Balance:</p>
<p className="text-lg">{sstkLoading ? "Loading..." : Number(bal).toFixed(3)} SSTK</p>
</div>
<div>
<p className="text-lg font-semibold text-[--headings]">Total Supply:</p>
<p className="text-lg">{totalSupplyLoading ? "Loading..." : Number(supply).toFixed(3)} SSTK</p>
</div>
</div>
</div>
</section>
{/* Community --> */}
<div className="flex w-full flex-col items-center justify-center gap-4 bg-footer-image bg-cover bg-center bg-no-repeat px-4 py-16 md:px-8">
<div className="flex flex-col items-center gap-4">
<img
src={"assets/footerLogo.svg"}
alt="burner banner"
className="mx-auto"
/>
<p className="text-center text-text-tertiary">
Join our community to learn and build together! And please raise an
issue on our Github if there's a new feature you'll like
to see
</p>
<a href="https://t.me/+sH0ug1mZ_WtjNmM0">
<button className="w-fit rounded-[12px] bg-background-primary-light px-12 py-3 text-accent-secondary transition-all duration-300 hover:rounded-[20px]">
Learn more
</button>
</a>
</div>
</div>
</main>
);
}
After updating the code, navigate to localhost:3000 in your browser to view the UI.
Reusable Components
There are a few reusable components that are generated for you.
The component folder contains several useful and customizable UI elements that can be used throughout your application.
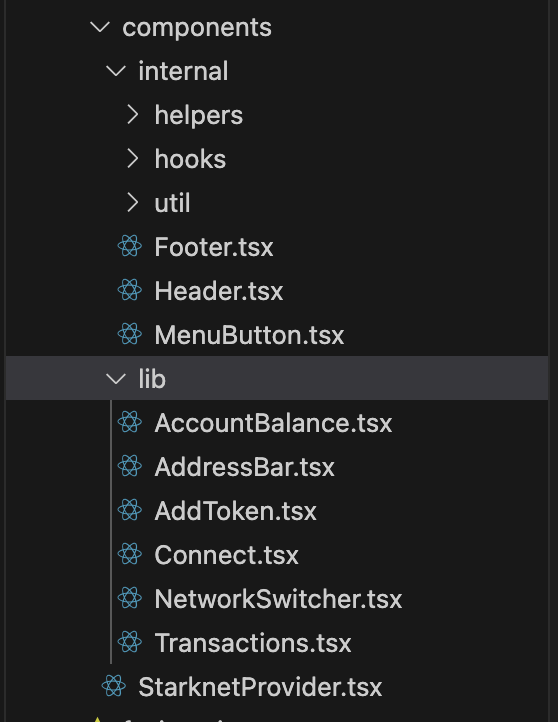
Here’s a summary of some key components:
- AccountBalance: This component displays the user’s account balance for ETH and STRK tokens. It uses the useContractRead hook to fetch balance information from the respective token contracts.
- AddressBar: This component displays the user’s Starknet address and provides functionality to copy the address and disconnect the wallet. It uses the react-blockies library to generate a unique avatar for each address.
- AddToken: This component allows users to add custom tokens to their wallets. It provides a form to input token details such as contract address, name, symbol, and decimals.
- NetworkSwitcher: This component allows users to switch between different Starknet networks (Mainnet and Sepolia). It provides a dropdown menu for network selection and handles the network switching logic.
- Connect: This component handles wallet connection functionality. It provides a modal with different wallet options for users to connect their Starknet wallets.
- NetworkSwitcher: This component allows users to switch between different Starknet networks (Mainnet and Sepolia). It provides a dropdown menu for network selection and handles the network switching logic.
- Transactions: This component provides a modal to display transaction history. It includes a list of transactions with details such as status, amount, and timestamp.
- CopyButton: A reusable button component that copies text to the clipboard and provides visual feedback.
- GenericModal: A reusable modal component that can be used to create various pop-up modals throughout the application.
These are designed to be modular and reusable, allowing for easy integration into different parts of the application.
They handle common functionalities in Starknet dApps, such as wallet connection, network switching, and displaying account information.
The components make use of hooks from @starknet-react/core for interacting with the Starknet blockchain and managing wallet connections. They also utilize Tailwind CSS for styling, making it easy to customize the appearance to fit your project’s design system.
Interact with contract using Burner Wallet
In the first part of this series we created a burner wallet, let’s go ahead and use it to test and interact with our contract.
Haven’t read Part 1? Make sure you go read it to learn how to create and fund a burner wallet.

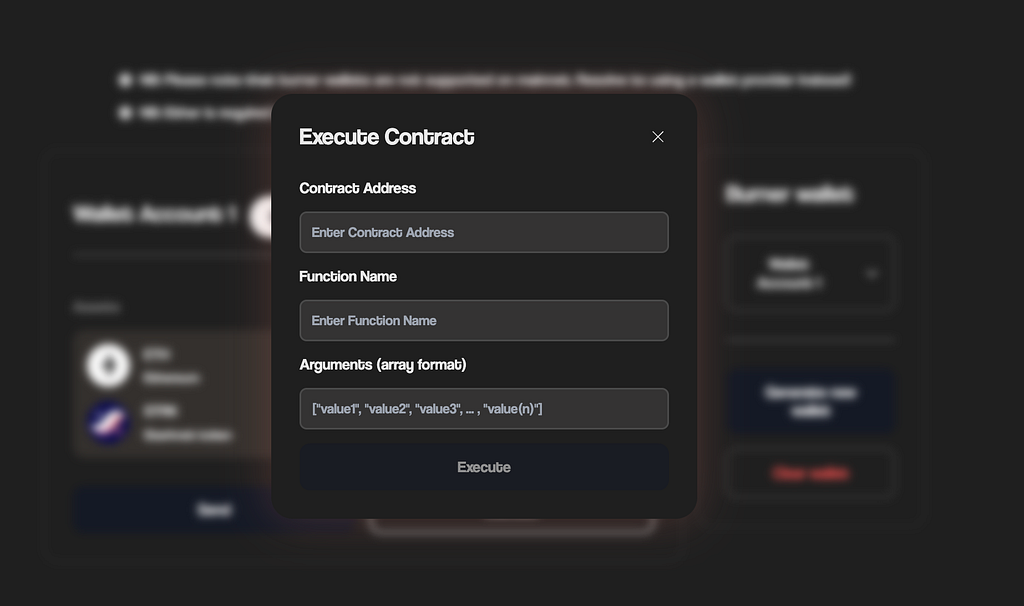
To execute a function in your contract:
- Click the “Execute” button: This will open a modal for function execution.
- Provide the following information:
- Contract Address
- Function Name
- Arguments (in array format)
That’s it! By following these simple steps, you can effectively use your burner wallet to test and experiment with your contract’s functionality.
Interact with the transfer functionality
The UI for our dApp showed that I currently have 90 SSTK in my wallet address. Let’s transfer 10 SSTK to another address.

After the transaction is successfully executed, refresh the dApp UI to see the updated balance.

Conclusion
Congratulations on completing the second part of our tutorial series on building and deploying a dApp using Starknet-Scaffold!
You’ve now created a user interface that interacts with your deployed Cairo smart contract, allowing users to view their SSTK token balance and execute contract functions directly from the UI.
Starknet Scaffold is an open-source project that thrives on contributions from developers like you. Whether you’re building, testing, or suggesting new features, your involvement is crucial to the growth and improvement of the ecosystem.
We encourage you to join the community, contribute to the project, and collaborate with other developers to push the boundaries of what’s possible in Web3.
Happy coding, and see you in the next article!
Useful links:
- Starknet Scaffold
- Starknet Scaffold Github
- Deployer
- Faucet
- Burner
- Scaffold Wikipedia
- Stark Converter
- Address Book
- Working TG group